"Mark for Review": Enhance Your Exam Prep Strategy | PrepareBuddy
 admin
admin


Need to quickly set up an exam for your peers, students, or team without requiring them to sign up? PrepareBuddy’s Shareable Exams feature makes it incredibly simple. Whether you’re teaching a class, running a training session, or just want to challenge your friends, this guide will walk you through the entire process. You don’t need technical know-how—just a few clicks, and your exam is live and ready.

Begin by heading to the Create Exam section on PrepareBuddy.
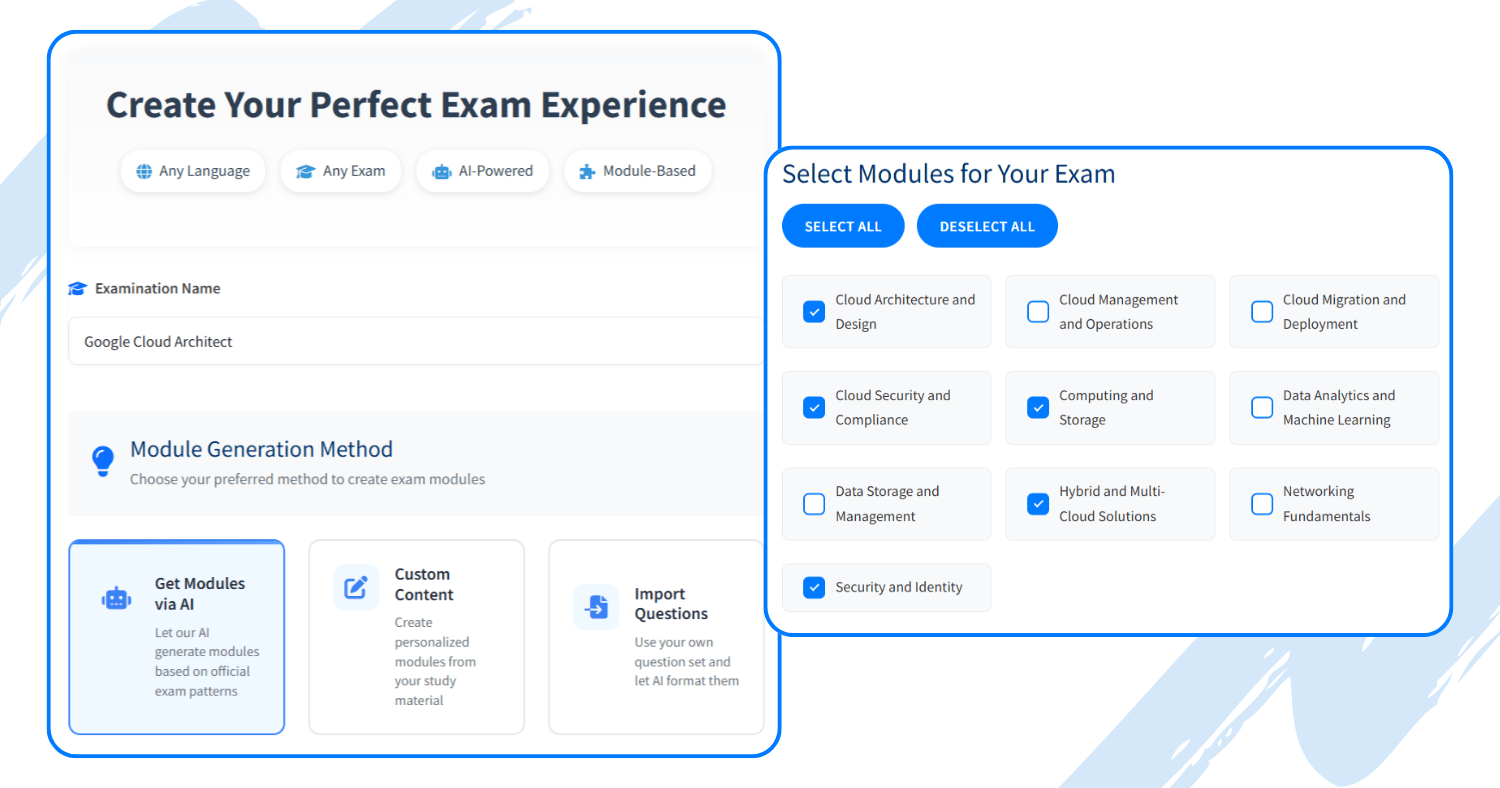
Next, you'll select how you want to build your exam. PrepareBuddy gives you flexibility here:
For this guide, we’ll go with "Get Modules via AI"—because it's fast and surprisingly accurate.
After selecting the AI option:
This step is like assembling the perfect playlist for study—you decide what gets included.
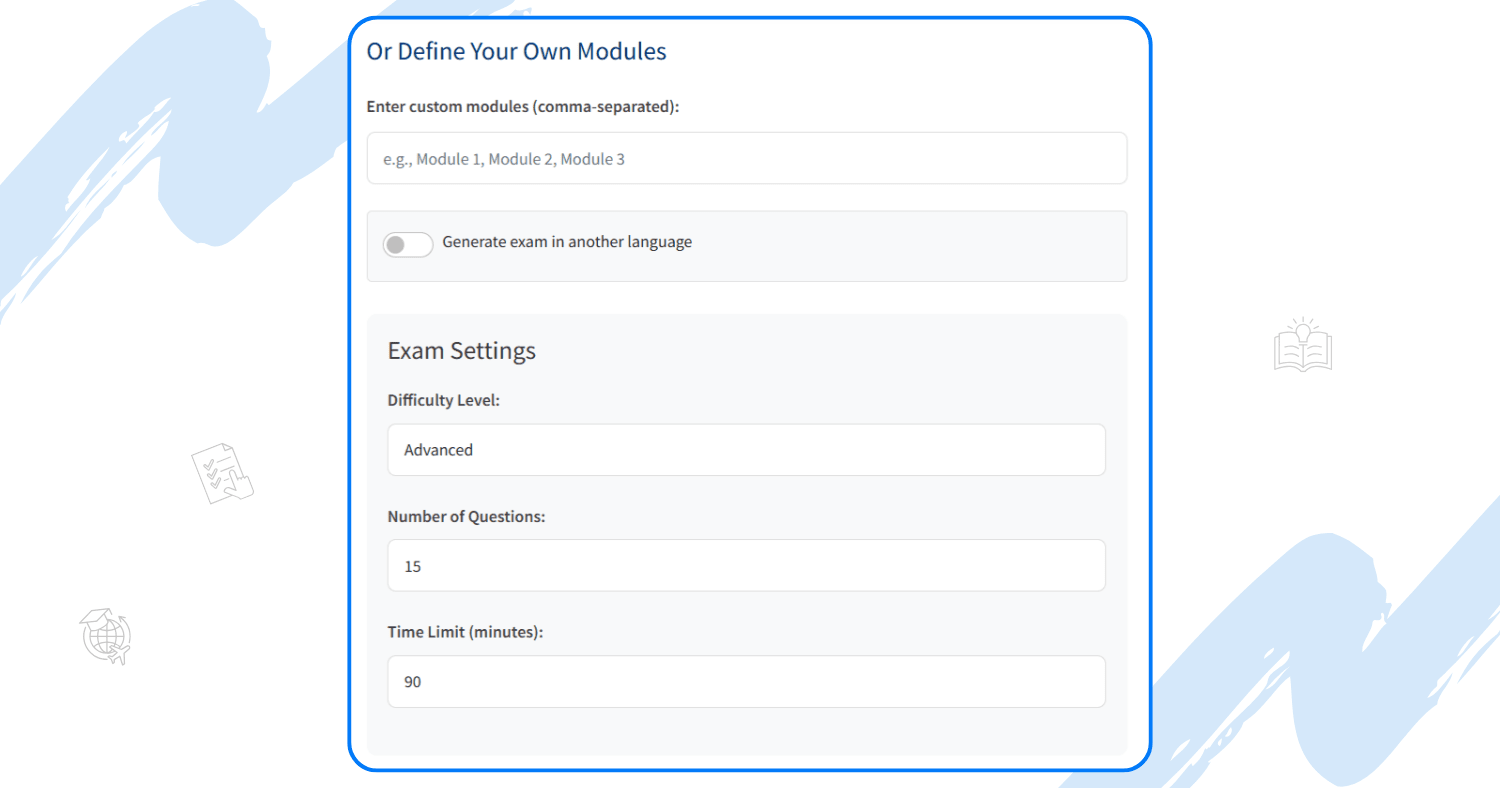
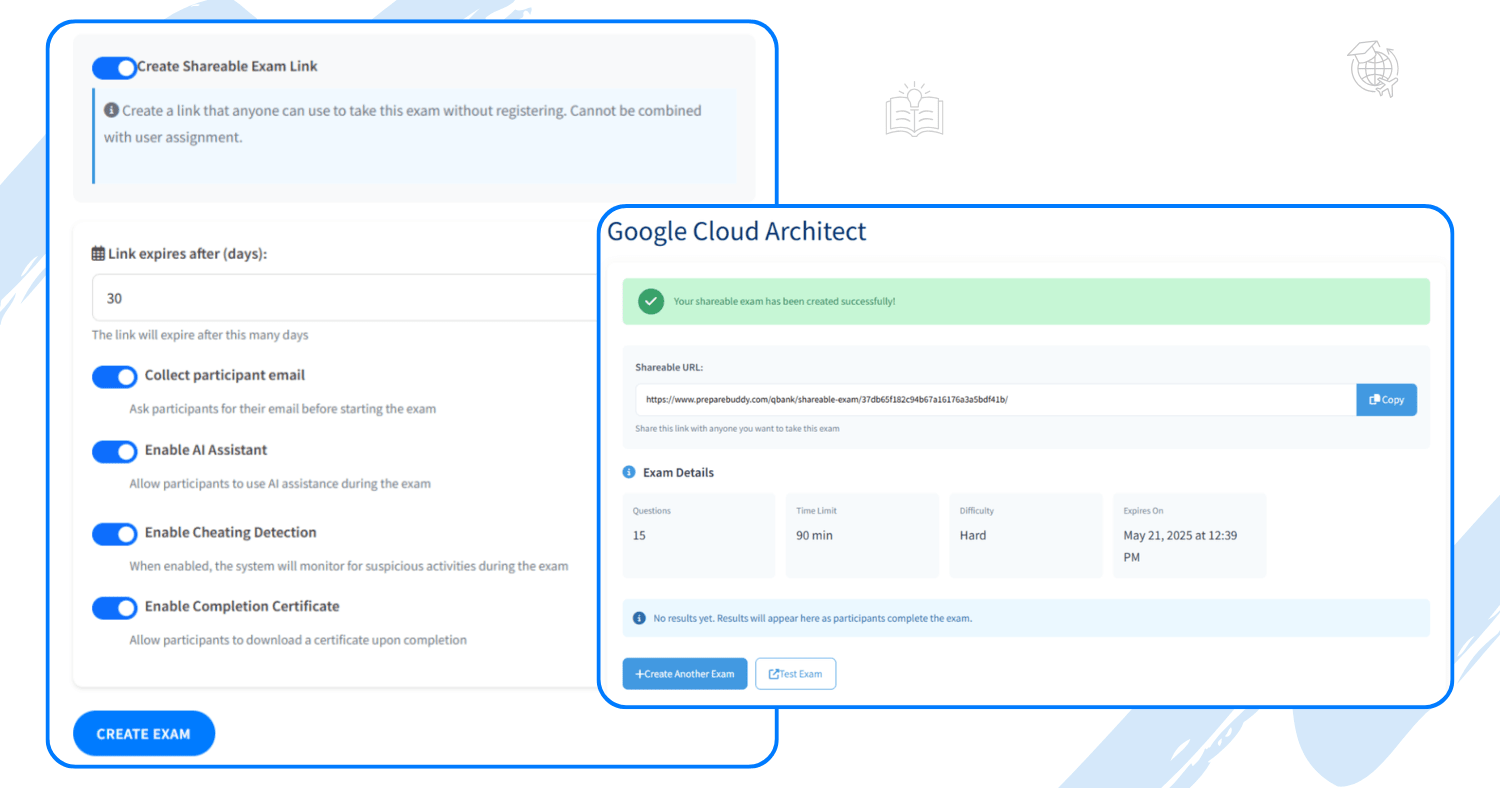
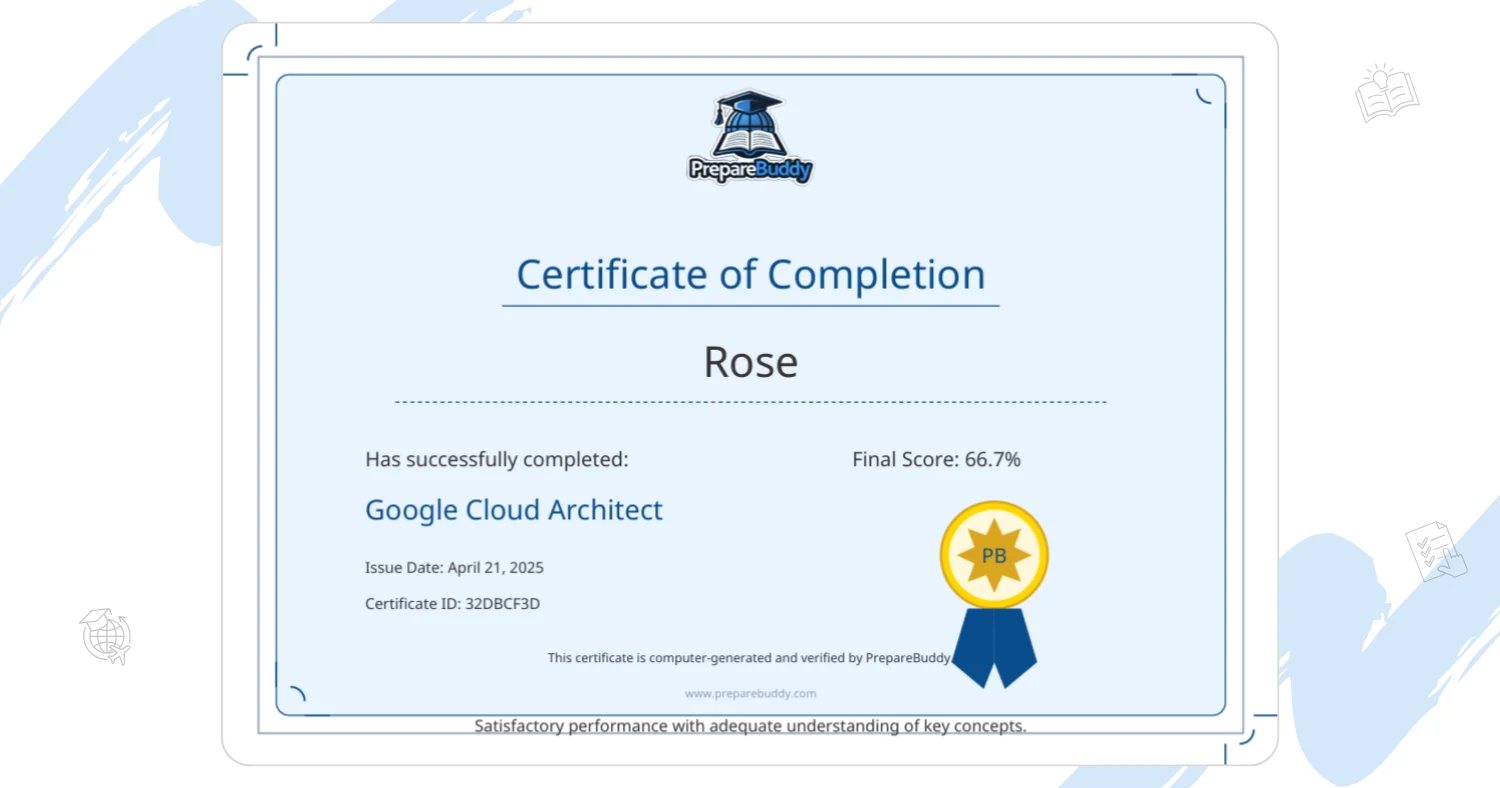
Tailor the exam experience to your audience with options like:
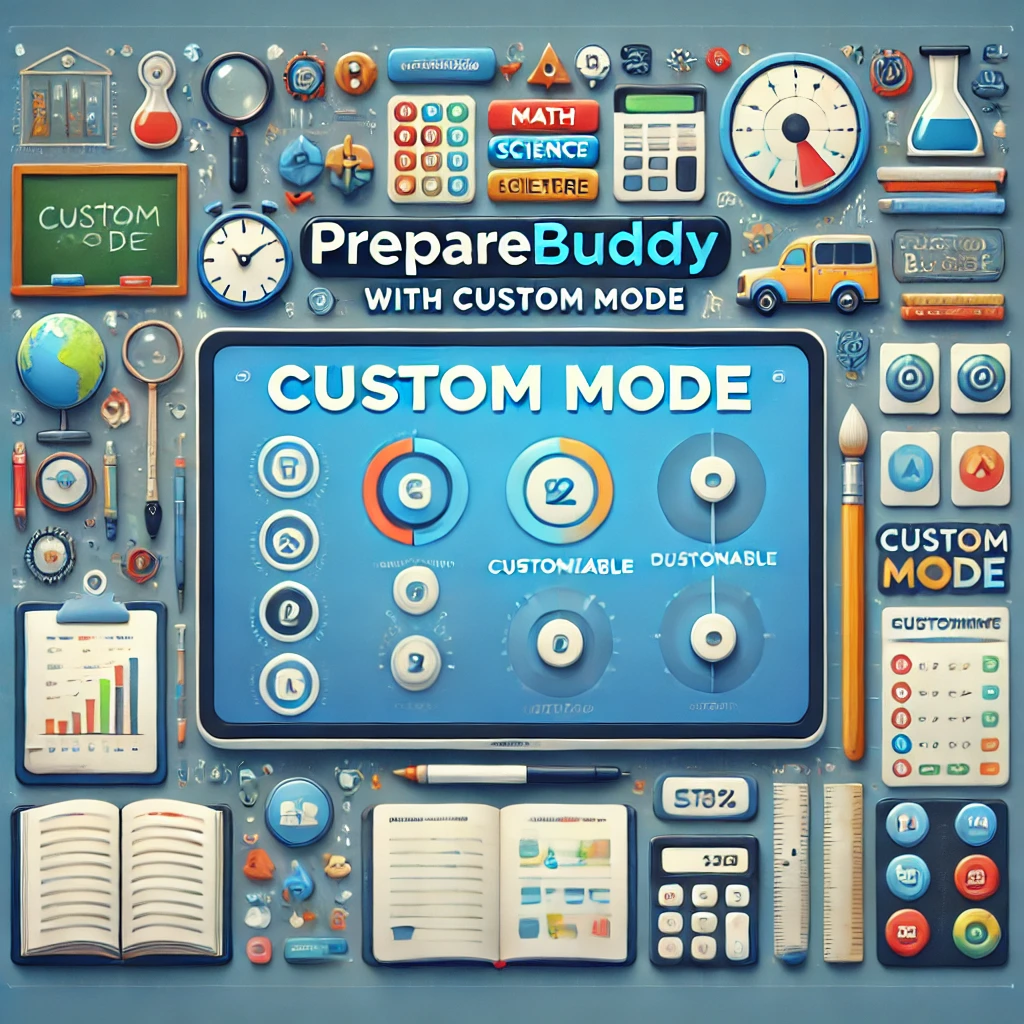
Here’s the game-changer:
Anyone with the link can take the exam without signing up.
This is ideal for:
Enable cheating detection to prevent dishonest attempts. The system monitors for browser switching, copy-pasting, and other suspicious behavior.
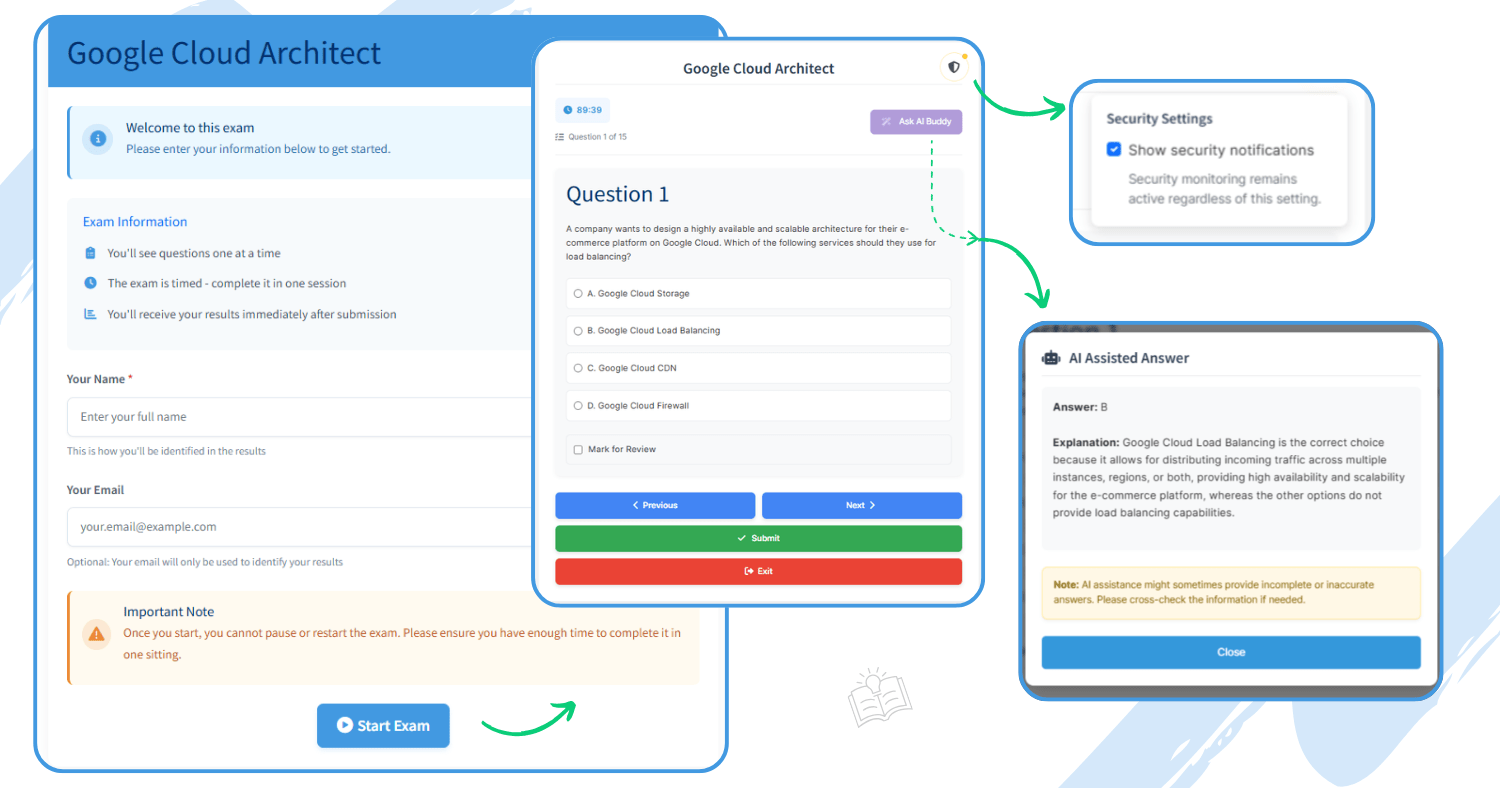
Once shared, participants can dive right into the exam.
And if someone gets stuck, the AI Buddy is always ready in the bottom right corner to:
Plus, real-time security alerts flag any unusual behavior to maintain exam integrity.
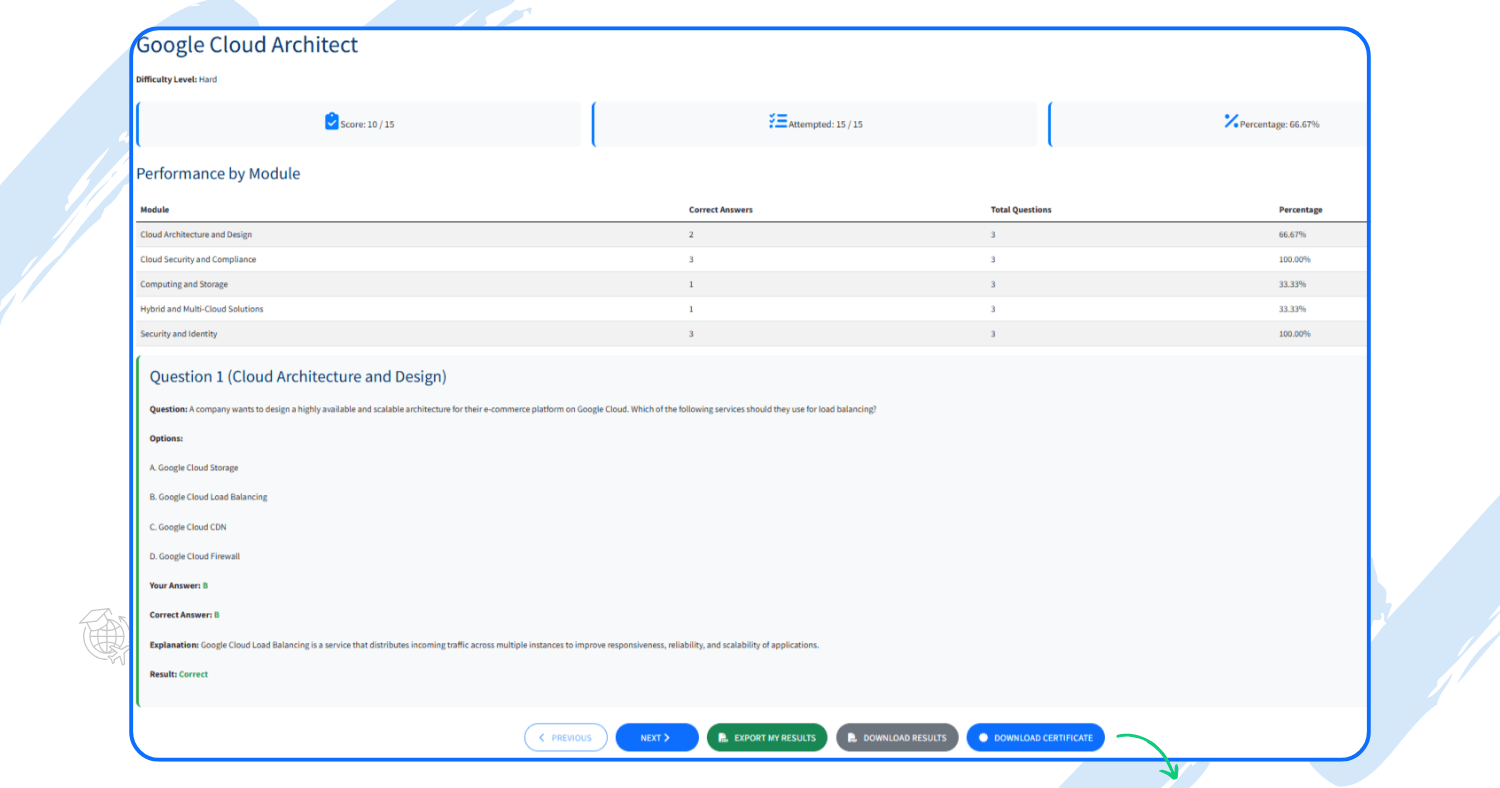
No waiting. No delays. As soon as the exam ends:
This makes Shareable Exams perfect for quick feedback loops, online competitions, and professional development.
Whether you're hosting a practice test for a certification, running a remote quiz competition, or creating a mock exam for students, PrepareBuddy’s Shareable Exams tool brings speed, simplicity, and smart tech to your fingertips.
No user accounts, no complex setup—just create, share, and test.
Read - User Guide: How to Prepare for Professional Exams on PrepareBuddy
Head to the Create Shareable Exam page and start building yours today.
Create. Share. Test. Learn. Smarter assessments, made easy with PrepareBuddy.
admin
admin