User Guide: Creating Custom Exams with AI-Powered Modules
 Anees
Anees


Creating custom exams has never been easier with PrepareBuddy's intuitive AI-driven platform. Whether you're a teacher, tutor, or self-learner, you can quickly import your questions in any format and let the system handle the rest. From auto-formatting and grading to multilingual support, PrepareBuddy simplifies the process so you can focus on what matters most—learning. Read on to discover how you can create personalized exams in minutes!
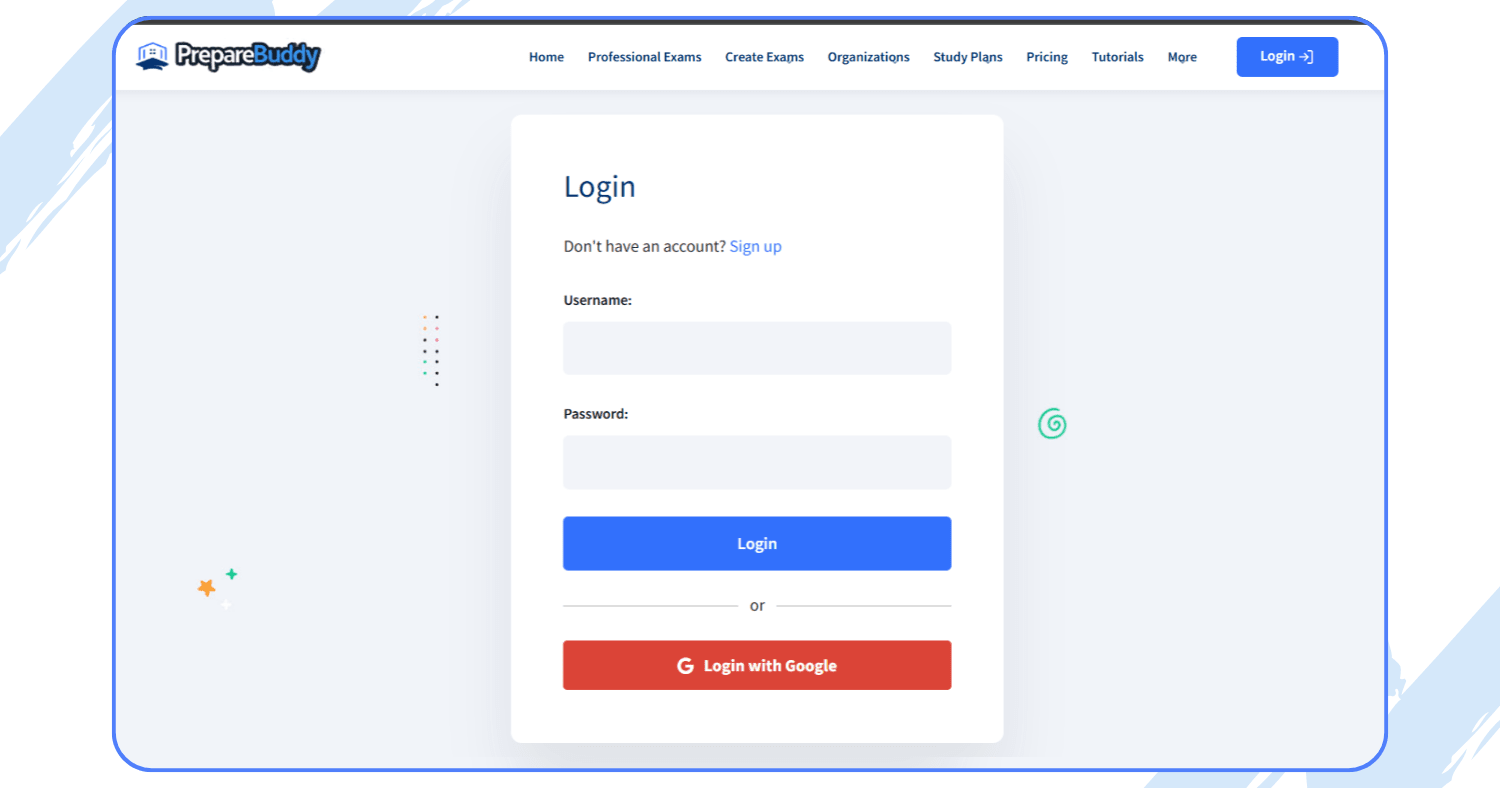
First things first—head over to PrepareBuddy and sign up or log in. Once you're in, navigate to the Create Exam section. This is your gateway to building a fully personalized testing experience.
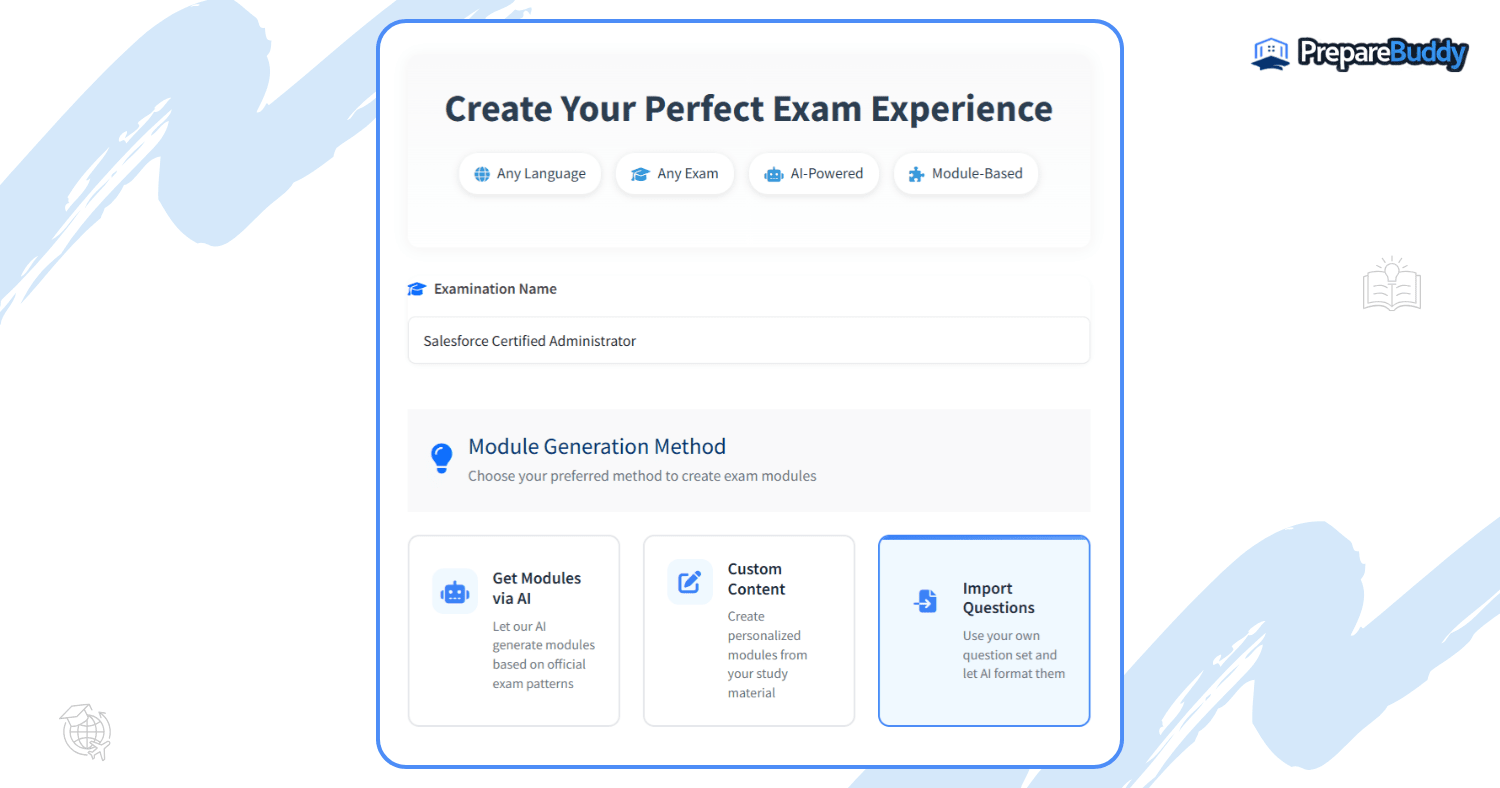
Give your exam a meaningful name—something like "Data Structures Practice Set" or "Marketing Mock Test." This will help you stay organized. Once you've named your exam, go to the Module Generation Method and select Import Questions. This feature is designed for users who already have question sets and just want a quick, smart way to format and organize them.
Read - User Guide: Creating Custom Exams with Custom Content Module
This part is incredibly flexible. Paste your questions into the input field—text, CSV, JSON, or anything else you have. Don’t worry about formatting. PrepareBuddy’s AI will automatically clean up and standardize your questions.
It’s that simple. No tedious editing or reformatting required.
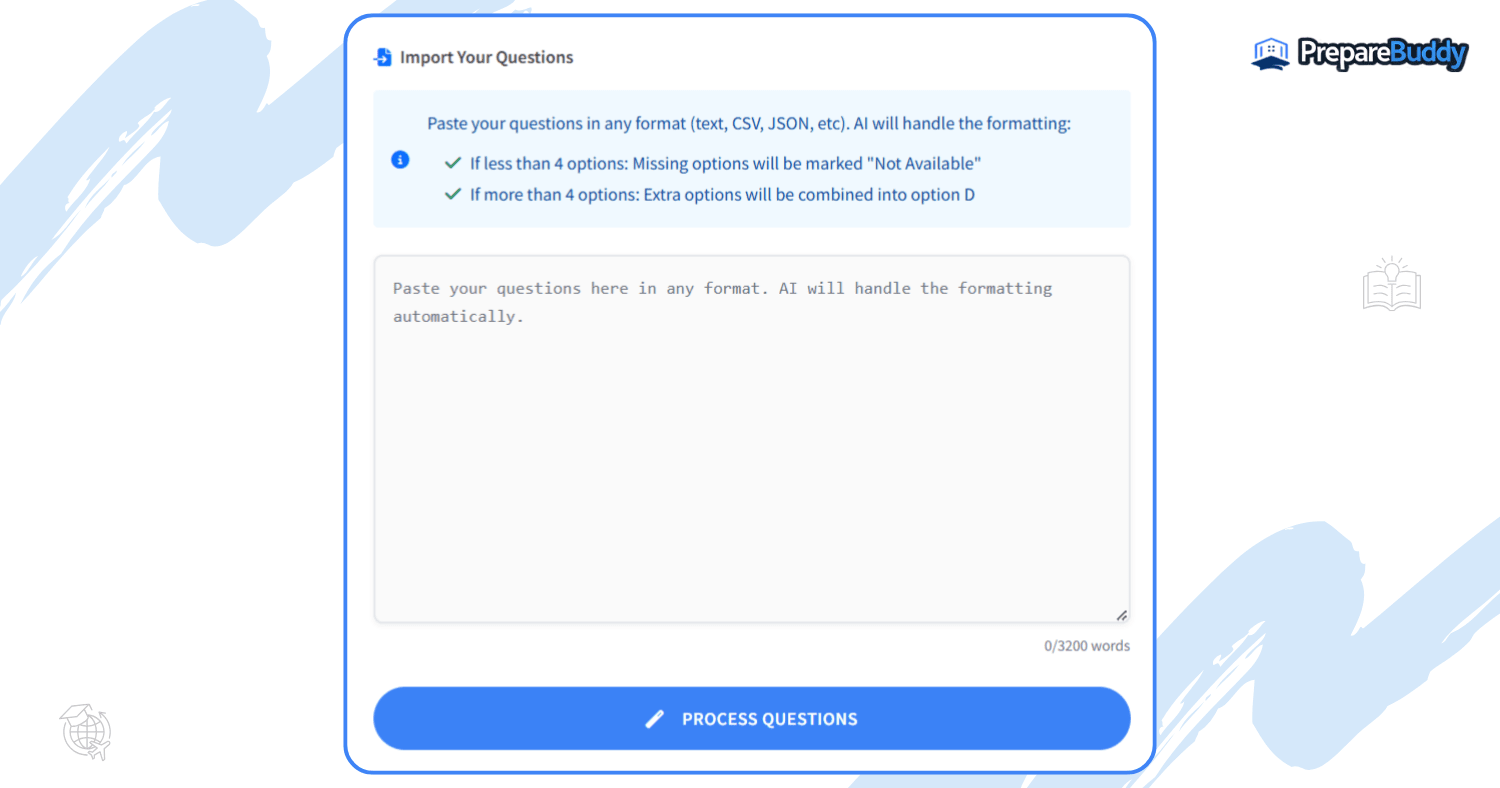
Click Process Questions, and the AI will scan your input and sort everything into clean, coherent exam modules. These modules are structured for clarity, ensuring you or your learners don’t miss any important topics.
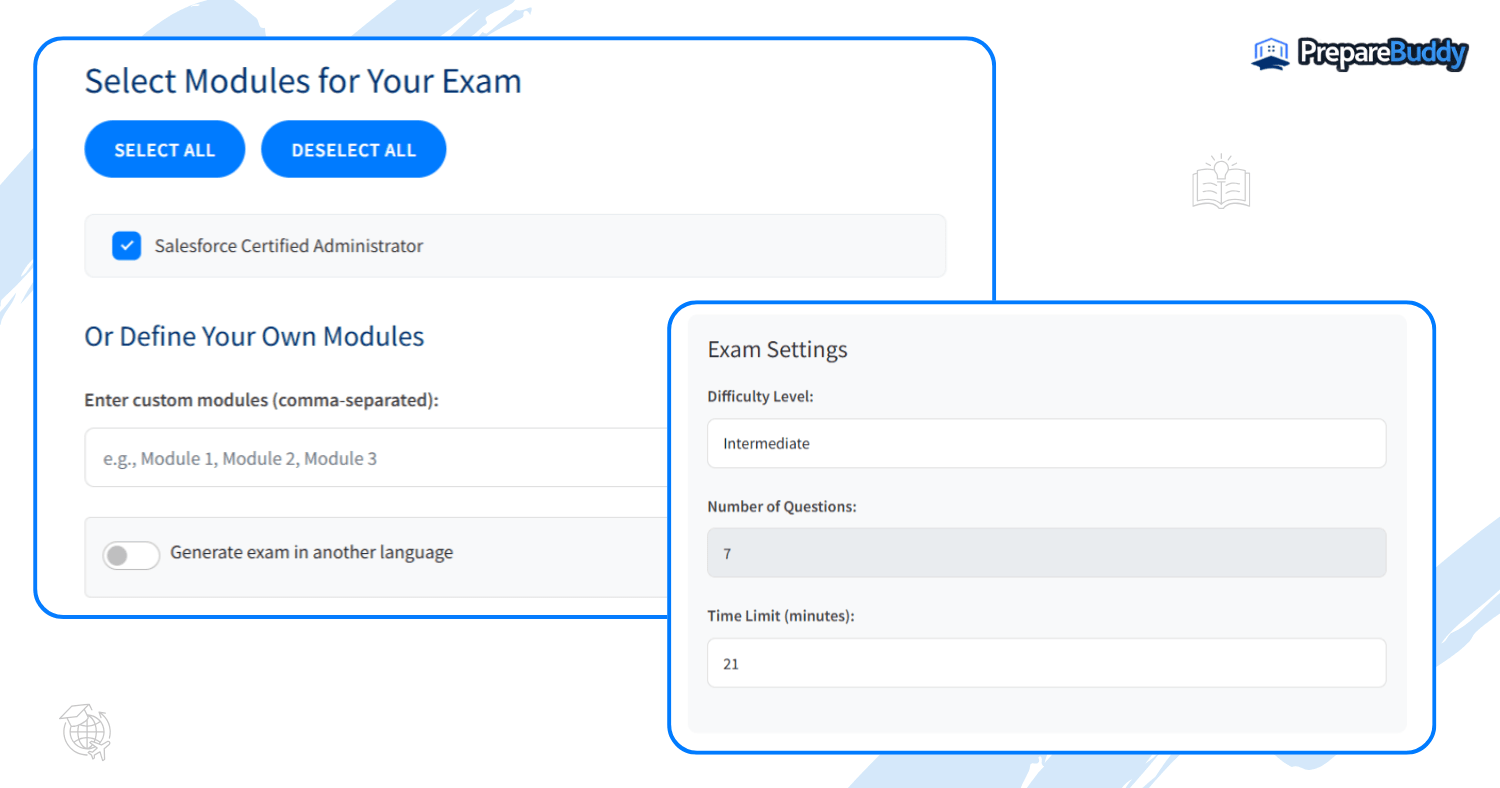
Pick the modules you want to include in your exam. Want to make it multilingual? You can translate the entire exam into another language with just a click. Perfect for international learners or bilingual test prep.
Now customize the experience:
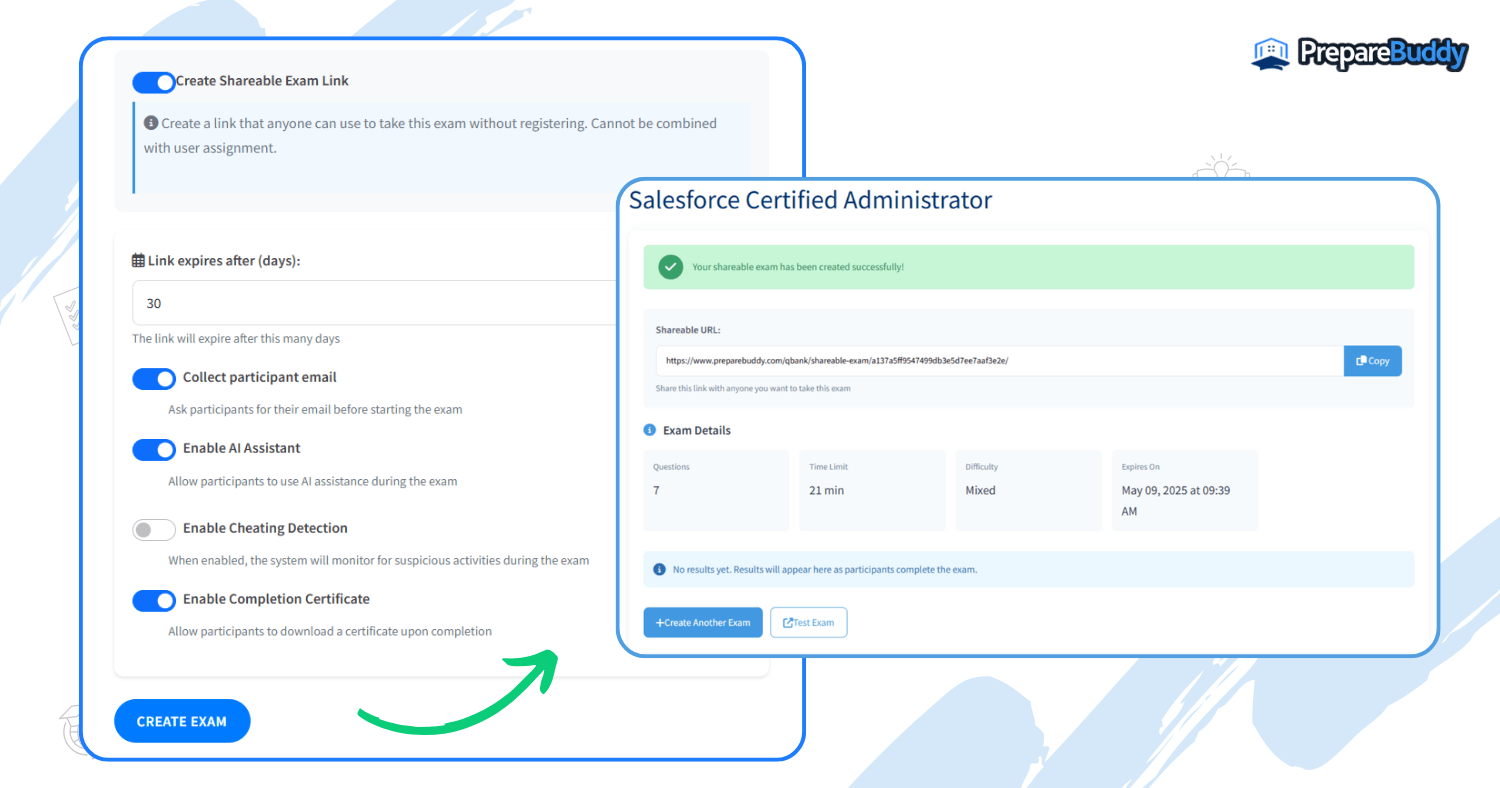
Want to share the exam with classmates, your study group, or trainees? Use the Create Shareable Link option. This lets anyone take the exam without needing to register. Just remember, this option can’t be used if you’re assigning to specific registered users.
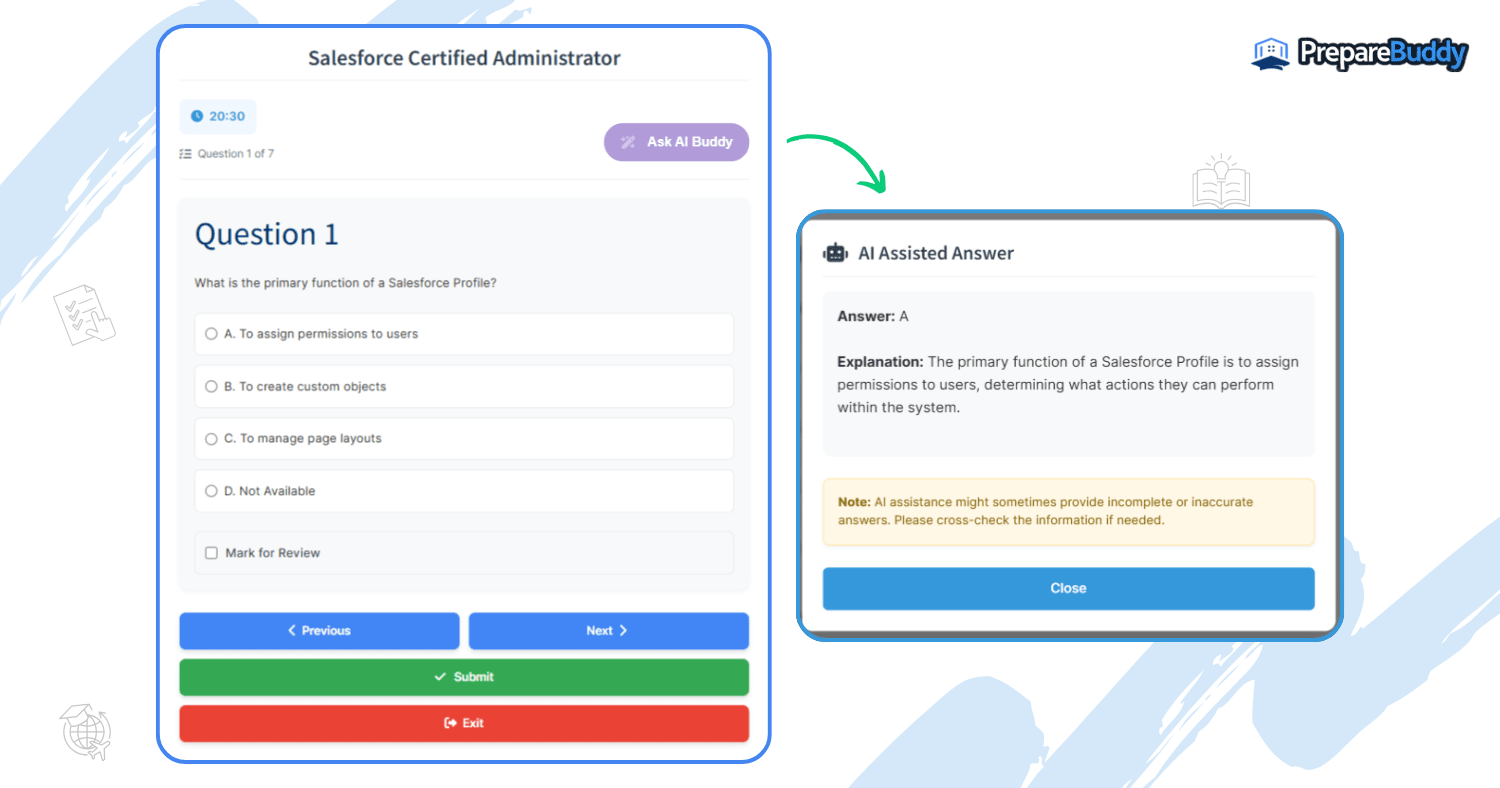
Click Start Exam and begin testing. Stuck on a question? Don’t stress. The AI Buddy is right there in the bottom-right corner—ask it anything. Whether you need a hint or an explanation, it’s got your back.
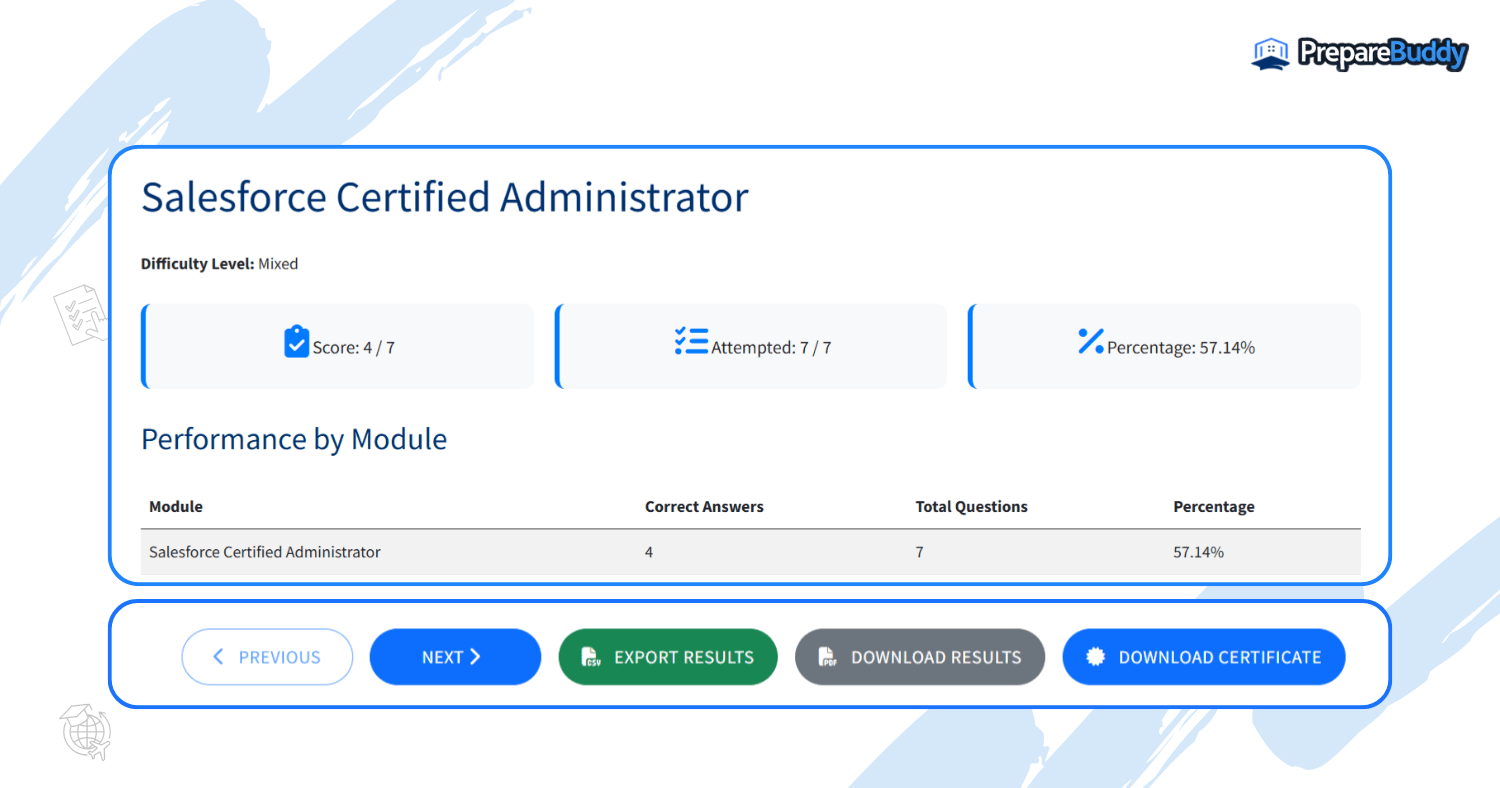
As soon as you submit the exam, your results are ready. You’ll get:
Great for keeping track of progress or adding to your portfolio.
If you already have your questions ready, the Import Questions method on PrepareBuddy is the quickest, most efficient way to turn them into a structured exam. From smart formatting to multilingual support and instant grading, it’s built for speed and convenience.
Try it out today—your perfect exam is just a few clicks away.
Start importing your questions now
Need help along the way? Check out the Help Center or reach out via live chat.